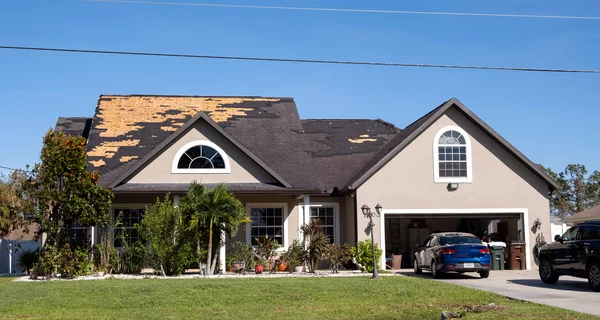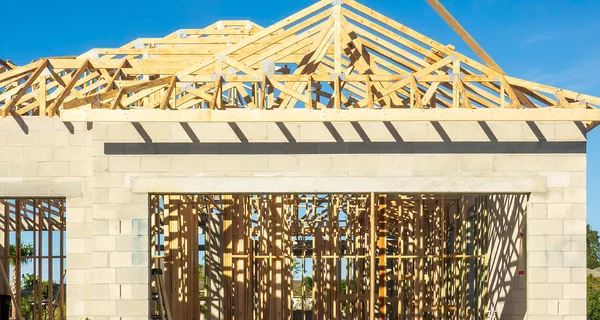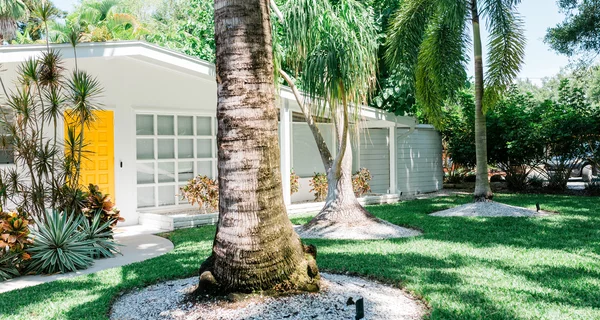


The My Safe Florida Home inspection is the gate the whole program runs through: no inspection, no grant, and only the improvements the inspection report recommends are eligible for funding. It is also, on its own, one of the best free products in Florida homeownership, because the same visit documents insurance credits that participants report are worth an average of $981 per year, and about 49% of them see a discount.
Understanding what the inspector looks for turns the visit from a mystery into a checklist you can prepare for. Here is the walk-through, feature by feature, plus how to read the report when it lands in your portal account.
Where the Inspection Fits in the Program
After you create your account and complete the prioritization questionnaire at mysafeflhome.com, the program places you into an inspection group, you submit an inspection application, and a state-authorized wind-mitigation inspector is assigned to your home. The full sequence is in our application walkthrough.
The inspection produces the report; the report drives everything after it. Grant money follows its recommendations, and your insurance agent can act on its documentation immediately. Both jobs run through the same one-page state form.
The Form Behind the Visit: OIR-B1-1802
Florida standardizes wind-mitigation findings on the OIR-B1-1802, the Uniform Mitigation Verification Inspection form published by the Florida Office of Insurance Regulation. It is the same form a private wind-mitigation inspector fills out for $75-$150, and insurers must honor its findings when applying the premium credits required by Florida law.
One currency note worth knowing, because most online guides have not caught up: the form was overhauled effective April 1, 2026 (revision 04/26, adopted under Rule 69O-170.0155 — its first major revision in 14 years). The current version runs nine numbered sections instead of the old seven, adds a wind-speed Region section and a roof-slope section, accepts documents as well as photographs as proof for each attribute, and prints its validity rule on every page: the form is good for up to five years provided no material changes have been made to the structure. Replacing windows, re-roofing, or changing a garage door all count as material changes, which is why a fresh inspection follows any upgrade. We cover the form line by line in our OIR-B1-1802 explainer; here is what the inspector is checking during the program visit.
What the Inspector Checks, Feature by Feature
1. Building code era. When was the home permitted? Homes permitted under the post-2001 Florida Building Code (post-1994 South Florida Building Code in Miami-Dade and Broward) earn a baseline credit. Since the program requires a pre-2008 permit, most participating homes fall in the older, credit-poor era, which is the point: those are the homes with headroom to improve.
2. Roof covering. What is on the roof and when was it installed? The inspector checks for a permit date or product markings showing the covering meets current standards. A roof replaced after 2002 under permit typically qualifies; the original 1988 shingle roof does not.
3. Roof-deck attachment. How is the plywood or plank decking nailed to the trusses? From inside the attic, the inspector measures nail type and spacing. 8d ring-shank nails at 6-inch spacing rate far better than 6d smooth nails at 12 inches. This is pure attic evidence; no access, no credit.
4. Roof-to-wall connection. What holds the roof structure to the walls: toe-nails, clips, single wraps, or double wraps? Also verified from the attic. The difference between toe-nails and wraps is one of the largest single credits on the form, and it is exactly what hurricane straps retrofits address.
5. Roof geometry. Hip roofs (sloping on all sides) outperform gable roofs in wind and earn a credit. The inspector measures the roofline proportions. You cannot change this without re-framing, which is why nobody recommends chasing this credit; it simply is what it is.
6. Secondary water resistance. Is there a sealed barrier (peel-and-stick membrane) on the deck seams under the covering? This is what keeps rain out after a storm strips shingles. Verifiable during reroofs or from documentation; one of the most cost-effective upgrades when a reroof is happening anyway.
7. Opening protection. Are all windows, doors, garage doors, and skylights protected by impact-rated products or approved coverings? The inspector checks labels and approval documentation on every opening. The rating is all-or-nothing: one unprotected opening and the home does not earn the full protection classification. This single line is where impact windows, impact doors, and rated garage doors enter the picture, and it is usually the largest credit available on South Florida homes. Our guide to what a wind mitigation inspection actually checks details the label evidence inspectors accept.
How to Prepare for the Visit
The inspection is documentary, not judgmental; you cannot talk your way into better findings, but you can make the evidence findable.
- Clear the attic access. Features 3 and 4 are verified from inside the attic. A blocked hatch can mean "unknown" on the form, which rates the same as the worst answer.
- Gather permits and paperwork. Roof replacement permits, window NOAs or product approval sheets, garage door documentation, prior wind-mitigation forms. Paper fills gaps photos cannot.
- Check your window labels. Impact glass carries a small etched or applied label in a corner. If your windows are impact-rated but unlabeled, the product approval paperwork becomes the evidence, so find it. Our guide to telling whether windows are impact-rated shows what to look for.
- Plan for 30-60 minutes. The inspector photographs the roof, attic, and every opening. Pets crated, gates unlocked.
Reading the Report: Two Sections That Matter
Recommended improvements. The list of upgrades the program will consider funding for your home, typically drawn from: opening protection (windows, doors, garage door, shutters), roof-to-wall connection upgrades, roof-deck renailing, and secondary water resistance. This list is your grant's boundary. If opening protection appears on it, our guide to spending the grant on impact windows covers how to get the most from the $10,000.
Existing credit-eligible features. Everything the inspector verified that already earns insurance credits. Send this section (or the completed 1802 that accompanies it) to your insurance agent the week you receive it and ask them to reapply your wind-mitigation credits. This step costs nothing, requires no construction, and is where the program's reported $981-per-year average savings come from. Our insurance savings guide explains how the credits stack.
If a finding looks wrong (the report says "no deck attachment credit" but your roofer's permit says otherwise) do not argue it at the visit. Submit the documentation through your portal account and, for insurance purposes, a private re-inspection with the paperwork in hand can correct the record for $75-$150.
Not the Same Visit: Wind Mitigation vs. the Other Inspections
Florida homeownership involves enough inspection types that they blur together, and homeowners regularly prepare for the wrong one. Quick disambiguation:
| Inspection | Who orders it | What it decides |
|---|---|---|
| Wind mitigation (this one) | You, or the program | Insurance credits and grant recommendations |
| Four-point | Your insurer, older homes | Whether a carrier will write the policy at all |
| Home inspection | A buyer | Purchase decisions; condition of everything |
| Appraisal | A lender | Market value for the mortgage |
| Final building inspection | Your contractor's permit | Whether completed work meets code |
Two of these matter inside the program. The wind-mitigation inspection opens the process, and the final building inspection closes it: grant reimbursement waits on the permit's final inspection passing. The four-point deserves a mention because insurers of older homes often demand it alongside wind mitigation, and it looks at different things (roof age, electrical, plumbing, HVAC). A gleaming wind-mitigation report does not rescue a four-point that finds a 22-year-old roof, which is one more reason roof recommendations on your program report deserve attention even when windows are the exciting line item.
What the Inspector Will Not Do
Knowing the boundaries of the visit prevents both disappointment and bad decisions:
- No repairs, no quotes, no sales. The program inspector documents; they do not fix, bid, or recommend contractors. Anyone who inspects and then offers to sell you the recommended work in the same visit is not operating inside the program's lane, and that conflict of interest is exactly what the state's inspector-contractor separation is designed to prevent.
- No pass or fail. There is no failing grade. The form records what exists. A home with zero credits and five recommendations did not fail; it received a shopping list with state money potentially attached.
- No insurance filing. The inspector does not send anything to your carrier. Getting the findings to your agent, and the premium reduction that follows, is your move.
Typical Findings by Home Era
After enough of these reports, patterns emerge by construction era. Your home will vary, but this is the shape of what inspectors usually find:
| Home era | Common findings | Usual recommendations |
|---|---|---|
| Pre-1985 | Toe-nailed roof framing, 6d deck nails, no opening protection | Roof-to-wall straps, deck renailing at reroof, full opening protection |
| 1985-1994 | Mixed connections, original single-pane windows | Opening protection first, straps where accessible |
| 1994-2001 (Miami-Dade/Broward) | Post-Andrew code features present, partial protection | Complete the openings; document everything else |
| 2002-2007 | Good structure, credit-eligible roof, openings unprotected | Opening protection is typically the whole list |
That last row explains a pattern in the program's own data: the 2002-2007 house is the sweet spot where one improvement (protecting the openings) completes the home. It is also why impact windows dominate grant spending on newer-but-pre-2008 homes while roof work dominates on older ones. If your home has been reroofed since 2002 under permit, expect the findings to look one or two rows better than its birth year suggests; a permitted reroof drags deck nailing and often secondary water resistance up to modern standards along the way, and the permit date is the evidence the inspector wants to see.
After the Upgrades: Close the Loop
One step homeowners routinely skip: the wind-mitigation record does not update itself when construction finishes. After grant-funded improvements pass final building inspection, a new OIR-B1-1802 documenting the upgraded features is what makes your insurer apply the new credits. A private re-inspection costs $75-$150, takes the same 30-60 minutes, and on a home that just completed opening protection it typically pays for itself within the first month of the adjusted premium. Keep the before and after forms together; the pair is also persuasive documentation at resale, alongside the permits.
On validity: a completed OIR-B1-1802 remains usable for insurance purposes for five years from the inspection date, with the caveat printed on the form itself: provided no material changes have been made to the structure. Installing impact windows, re-roofing, or replacing a garage door are all material changes that retire the old form, and Citizens states flatly that a new form is required to claim opening-protection credit after remediation. The clock restarts whenever a new form is completed, which is one more reason to commission that post-construction re-inspection: it resets your five years with the upgraded features on record.
The revised form also added a rule that makes deferred maintenance expensive: openings in need of repair or replacement now disqualify a home from opening-protection credits entirely, no matter how many impact units are installed. A single cracked pane waiting on a someday repair zeroes the largest credit on the form until it is fixed and re-documented. If your inspection report flags a damaged opening, repairing it is not cosmetic; it is the difference between earning the credit and forfeiting it.
After the Report: The Fork in the Road
The inspection leaves you with two parallel tracks, and the smart move is running both:
- Insurance track, immediately. Credits for existing features apply now, grant or no grant. Agent, form, reapply.
- Grant track, patiently. If your income tier qualifies (check the income limits), the portal moves you toward a grant application for the recommended improvements. Funding follows the priority queue, and with the June 2026 budget carrying forward more than $405 million aimed at the inspection backlog, reports that have been waiting are finally being funded. One rule overrides everything on this track: no contracts, deposits, or work until written grant approval, or the application is void. The full My Safe Florida Home program guide has the details.
Next Steps
- Create your account and complete the questionnaire at mysafeflhome.com so the inspection clock starts; our application walkthrough covers each screen.
- Before the visit: clear the attic access, gather roof and window paperwork, and check your openings against our impact-glass identification guide.
- When the report arrives, send the existing-features section to your insurance agent the same week.
- If opening protection is recommended, price the grant strategies with a free estimate so approval day is contract day.
- Confirm your grant tier against the income limits and read the eligibility checklist before counting on funding.